Getting Started
When you first start the machine, and it boots from the CD-ROM, you will see the screen below.

Hopefully the welcome screen is mostly self-exlanatory.
Entering extra parameters during the initial boot is now rare as much more hardware is supported than was in the past. (One relatiively common option is to flag ide [CDROMs] to NOT use DMA -- I say relatively common, but this is for very old CDROMs which do not support it. In any case, if you have trouble installing, especially while copying files.
TURN OFF DMA by entering:
hugesmp.s ide=nodma
If no parameters are needed, simply hit the "Enter" key.
After that the kernel will load,
you'll see lots of text on the screen until it does...
Then you will be presented with the setup menu, show below.
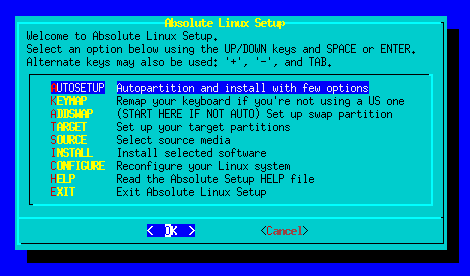
autoinstall
Should suffice for most users. This option prompts you to choose from the detected drives and will partition, install the packages and set up the boot loader for you. There are but a few decisions to make, such as choosing from list if more than one drive is detected; selecting the media to install from (usually a CD, but could be a drive partition) and will only later prompt for your timezone, set up network (if you want to during the install), ask what kind of mouse you use (usually just pick the default PS2) and ask for a root password for when you reboot at the end of installation.Let's peek at some screenshots to look things over step-by-step:
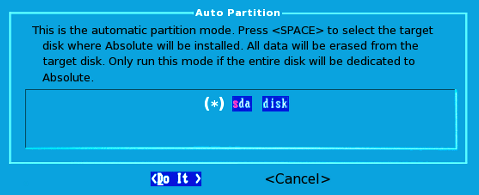
First screen warns about removing any data already on the hard drive. Only one drive is shown here, but if multiple drives are connected they should all be shown to select from... pressing the spacebar will select the presently highlighted drive. Hit "enter" while "Do it" is selected will move you to the next screen.
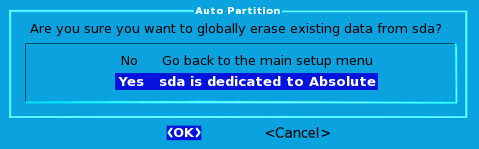
This one just makes sure you really want to partition the selected drive. Last chance to bail out before the drive is partitioned. ("NO" is the default, to avoid catastrophic errors.)
Setup wil flash an info box stating it is setting up the drive, then automatically go to the formatting screen below.
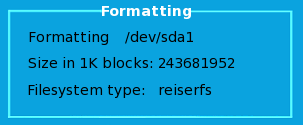
Setup will let you know when formatting is done and shows you what will be placed into the system fstab file. Again, just hit [Enter] to move on...

Once the TARGET (hard dive to install to) is partitioned and formatted, setup will ask you where to get the install files from. This will usually be the CDROM drive, so let's show screens from that...
Below is the choice of [SOURCE] locations:
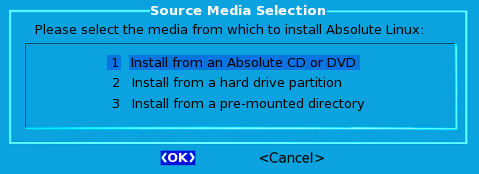
Almost always with a CDROM install, you can simply choose AUTO and the source disk will be found.
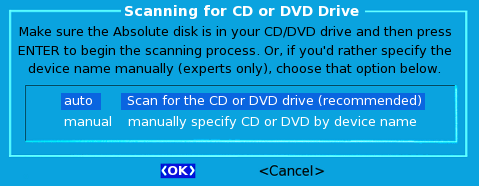
If scanning goes OK, setup will inform you where the CD was found, tell you it is going to start installing packages, then show the package information for each as the installation progresses. This is the longest part of the install and a good time to grab a cup of coffee (or two.)
There is no further user interaction until the install is nearly complete. The last few screens before the restart of your system is the configuration phase. (Of course, if you are not using autoinstall, there are quite a lot of screens in configuration.)